What You'll Learn
This guide covers everything you need to go from zero to confidently generating AI images. Whether you're a designer exploring new tools, a marketer building assets, or a hobbyist experimenting with creative AI — these fundamentals will get you producing quality results fast.
- Understanding different AI image models
- Writing effective prompts for better results
- Choosing the right model for your needs
- Advanced settings and parameters
- Common mistakes and how to avoid them
- Professional tips for stunning results
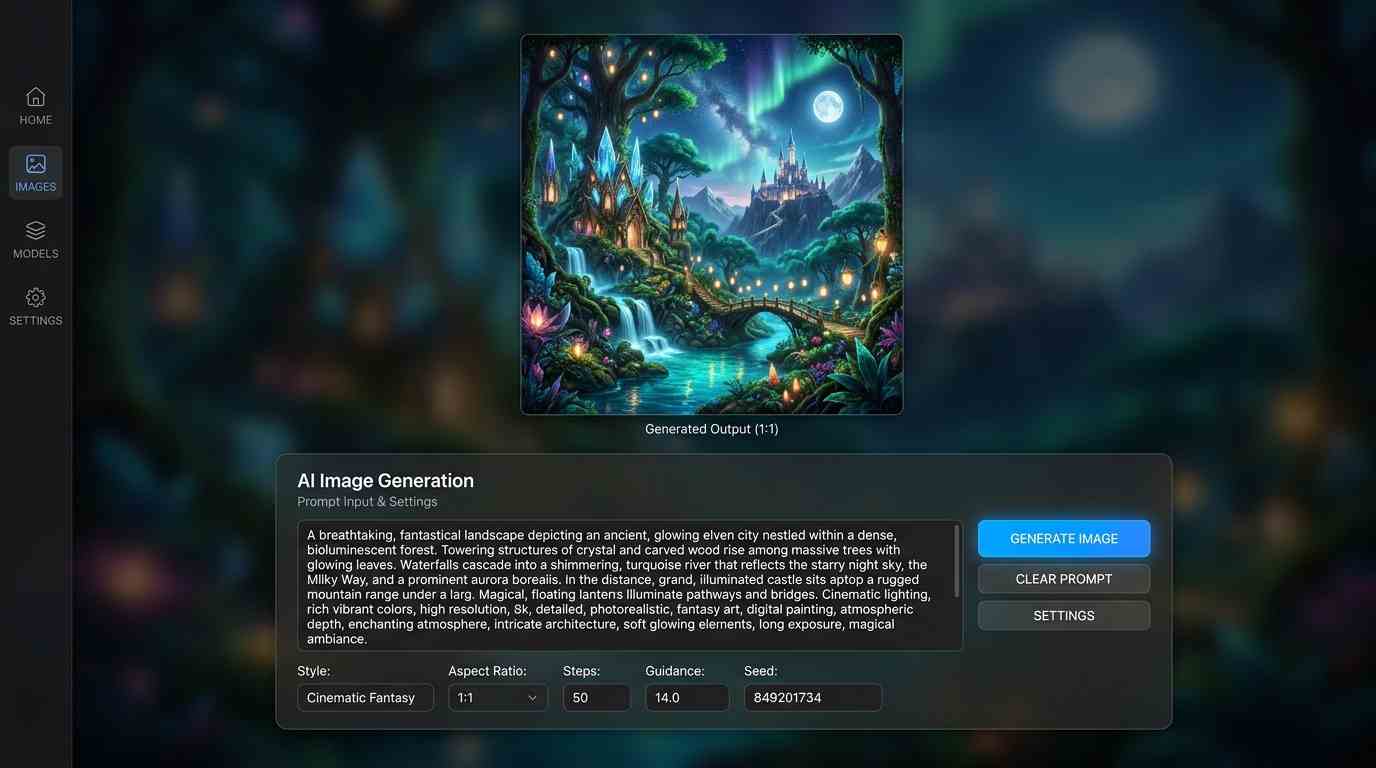
Understanding AI Image Generation
AI image generation uses advanced machine learning models to create images from text descriptions. These models have been trained on millions of images and can understand complex visual concepts, artistic styles, and photographic techniques.
How It Works
The generation pipeline breaks down into four stages. First, text processing — the AI analyzes your written prompt to understand what you want. Second, concept mapping — it maps text concepts to visual elements from its training data. Third, image synthesis — the model generates pixels that match your description. Finally, refinement — multiple passes improve quality and coherence, producing the final output.
Understanding this pipeline helps you write better prompts. The more specific and structured your text input, the more precisely the model can map your intent to visual output — and the better your final image will be.
Available AI Models
Fauxto Labs offers access to the most advanced AI image generation models. Each model has unique strengths and is optimized for different use cases — from fast editorial generation to premium commercial work with pixel-perfect detail.
Choosing the right model can dramatically improve your output quality while saving credits. The table below breaks down every available option.
| Model | Credits | Best For |
|---|---|---|
| FLUX Krea | 4 | Fashion photography, editorial, cinematic imagery |
| FLUX SRPO | 5 | Raw photorealism, everyday styles |
| FLUX Ultra | 9 | Ultra-high resolution, premium commercial work |
| FLUX 2 Edit | 5 | Image editing and inpainting |
| Nano Banana Pro | 15–30 | Image editing, inpainting, character consistency |
| Recraft V3 | 6 | 81 art styles, perfect text generation |
12+ models, unlimited possibilities
From FLUX to Recraft V3 — explore every model and find the perfect one for your project.
Writing Effective Prompts
The prompt is your primary tool for communicating with AI models. A well-crafted prompt can mean the difference between a mediocre image and a masterpiece. Structure matters just as much as vocabulary.
The formula is straightforward: combine a Subject, an Action or Pose, a Setting, and a Style or Mood. Layering these elements gives the model enough context to produce coherent, visually rich output every time.
Prompt Structure Formula
Examples by Skill Level
Beginner: "A cute cat sitting on a windowsill"
Intermediate: "A professional woman in a business suit giving a presentation in a modern conference room, confident pose, natural lighting"
Advanced: "Portrait of an elderly craftsman in his workshop, weathered hands holding antique tools, warm golden hour lighting streaming through dusty windows, cinematic depth of field, 85mm lens, highly detailed, photorealistic"
Notice how each tier adds more specificity. The advanced prompt controls subject, environment, lighting, lens simulation, and rendering intent — giving the model a complete blueprint to work from.
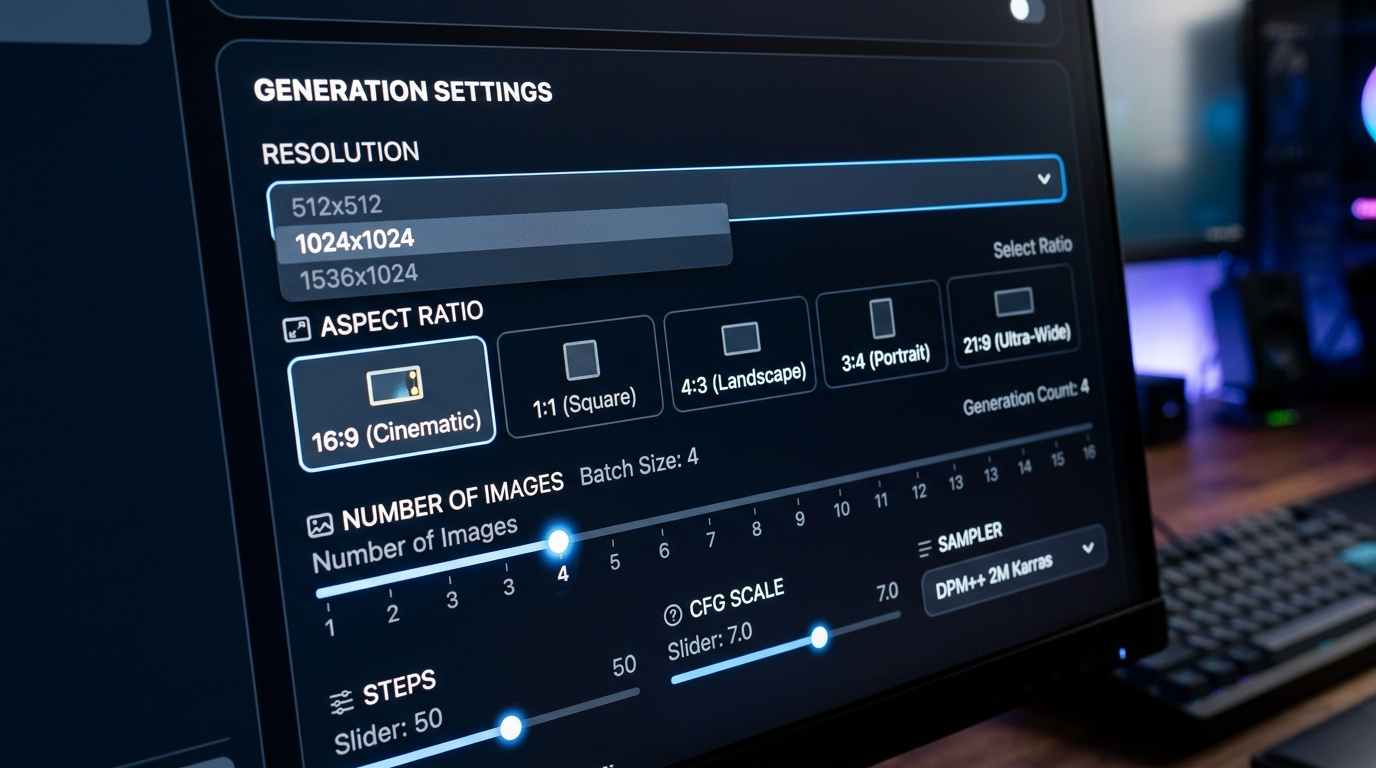
Advanced Settings & Tips
Beyond prompts, several parameters shape your results. Aspect ratio options include 1:1 (square), 16:9 (widescreen), 9:16 (portrait/mobile), 4:3 (standard), 3:4 (vertical), and 21:9 (cinematic) — choose based on your intended use case.
For character consistency across multiple images, the Nano Banana model family delivers best-in-class identity preservation using just a reference image — no training required. Nano Banana Pro (15–30 credits) maintains the same face, character, or product across unlimited generations with remarkable accuracy.
Frequently Asked Questions
Common questions about AI image generation on Fauxto Labs.
What AI image generation models does Fauxto Labs offer?
Fauxto Labs offers a comprehensive suite of image generation models including FLUX Krea (4 credits), FLUX SRPO (5 credits), FLUX Ultra (9 credits), FLUX 2 (4 credits), FLUX 2 Pro (7 credits), GPT Image 1.5 (3-25 credits), Nano Banana Pro (15-30 credits), Dreamina 3.1 (6 credits), Qwen (4 credits), SeedDream (5 credits), and Recraft (6 credits).
Which model should I use for photorealistic images?
For photorealistic images, FLUX SRPO (5 credits) delivers excellent raw photorealism. For premium commercial work, FLUX Ultra (9 credits) provides the highest quality. For editing existing photos, Nano Banana Pro offers excellent results with character consistency.
How do I write better prompts for AI images?
Structure your prompts with: Subject + Action/Pose + Environment + Style + Technical details. For example: "Professional woman, confident pose, modern office, corporate headshot style, 85mm lens, soft lighting, high detail." Be specific about lighting, composition, and mood.
Can I create consistent characters across multiple images?
Yes! The Nano Banana model family delivers excellent character consistency from just a reference image — no training needed. It maintains identity across unlimited generations, making it the simplest and most cost-effective way to produce consistent characters.
What aspect ratios are available?
Multiple aspect ratios are supported: 1:1 (square), 16:9 (widescreen), 9:16 (portrait/mobile), 4:3 (standard), 3:4 (vertical), and 21:9 (cinematic). Choose based on your intended use case.
Ready to Create Your First AI Image?
Start your AI image generation journey with Fauxto Labs. Access professional AI models, advanced tools, and join our community of creators.
Start Generating ImagesNo credit card required · Commercial license included · Start free today